Layered Lighting Design: How to Balance Ambient, Task, and Accent Lights
Reading time: 14 minutes
Ever walked into a room that just felt right — warm, inviting, perfectly functional — but couldn’t quite explain why? Chances are, someone nailed the lighting. And conversely, ever squinted at a desk under a single harsh overhead bulb, or stumbled through a dimly lit hallway that made your home feel more like a cave than a sanctuary? That’s what happens when lighting goes wrong.
Here’s the straight talk: most people treat lighting as an afterthought. They throw in a ceiling fixture, maybe a floor lamp, call it a day, and wonder why their beautifully decorated room still feels flat or exhausting to be in. The truth is, lighting is the single most transformative design element in any space — and layering it correctly is both a science and an art.
In 2026, as smart home ecosystems have become more accessible and energy-efficient LED technology has matured into an incredibly versatile toolset, there has never been a better time to master layered lighting. Whether you’re redesigning a single room or planning a whole-home lighting strategy, this guide will walk you through everything you need to know — practically, clearly, and with real-world examples you can actually use.
Table of Contents
- What Is Layered Lighting and Why Does It Matter?
- The Three Core Layers: Ambient, Task, and Accent
- How to Balance the Three Layers in Any Room
- Room-by-Room Strategy: Practical Scenarios
- Smart Lighting in 2026: Integrating Technology
- Common Layered Lighting Mistakes and How to Fix Them
- Lighting Layer Comparison at a Glance
- Frequently Asked Questions
- Light Your Way Forward: An Action Plan
What Is Layered Lighting and Why Does It Matter?
Layered lighting is the deliberate combination of multiple light sources — each serving a distinct purpose — within a single space. Rather than relying on one dominant fixture to do all the work, layered lighting creates depth, dimension, functionality, and mood by stacking complementary sources that can be used individually or in concert.
Think of it like audio mixing. A song isn’t just one instrument blaring at full volume — it’s bass, melody, rhythm, and vocals balanced to create something that resonates emotionally. Your room’s lighting should work the same way.
The concept isn’t new — interior designers and architects have used it for decades — but it’s gained tremendous popular traction in recent years. According to the American Lighting Association’s 2025 Home Lighting Report, 68% of homeowners who renovated their spaces in 2024–2025 cited lighting design as a top priority, up from just 41% in 2019. Meanwhile, a separate survey by Houzz in early 2026 found that layered lighting was the #1 most requested feature among clients working with interior designers.
Why the surge in interest? A few converging forces: the work-from-home revolution has made people hyperaware of how light affects productivity and mood; smart lighting platforms have made multi-layer setups far easier to control; and a growing body of research connects lighting quality to measurable health outcomes, including sleep quality, stress levels, and even cognitive performance.
“Lighting isn’t decoration. It’s the invisible architecture of a room. Get it wrong, and no amount of beautiful furniture or paint can save the space.” — Nate Berkus, Interior Designer
The Three Core Layers: Ambient, Task, and Accent
Layer 1: Ambient Lighting — The Foundation
Ambient lighting is your base layer — the general illumination that allows people to navigate and use a space safely. It’s sometimes called “general lighting,” and it sets the overall tone and brightness of a room. Without adequate ambient light, everything else falls apart.
Common ambient light sources include:
- Recessed ceiling fixtures (can lights / downlights)
- Flush-mount and semi-flush ceiling fixtures
- Chandeliers and pendant lights positioned centrally
- Cove lighting and indirect ceiling-wash techniques
- Track lighting used broadly across a room
The key characteristic of good ambient lighting is that it should be even and diffused — minimizing harsh shadows while providing enough luminosity to see clearly. The recommended illuminance level for ambient light in living areas is typically 150–300 lux, while kitchens and workspaces may benefit from 300–500 lux at the general level.
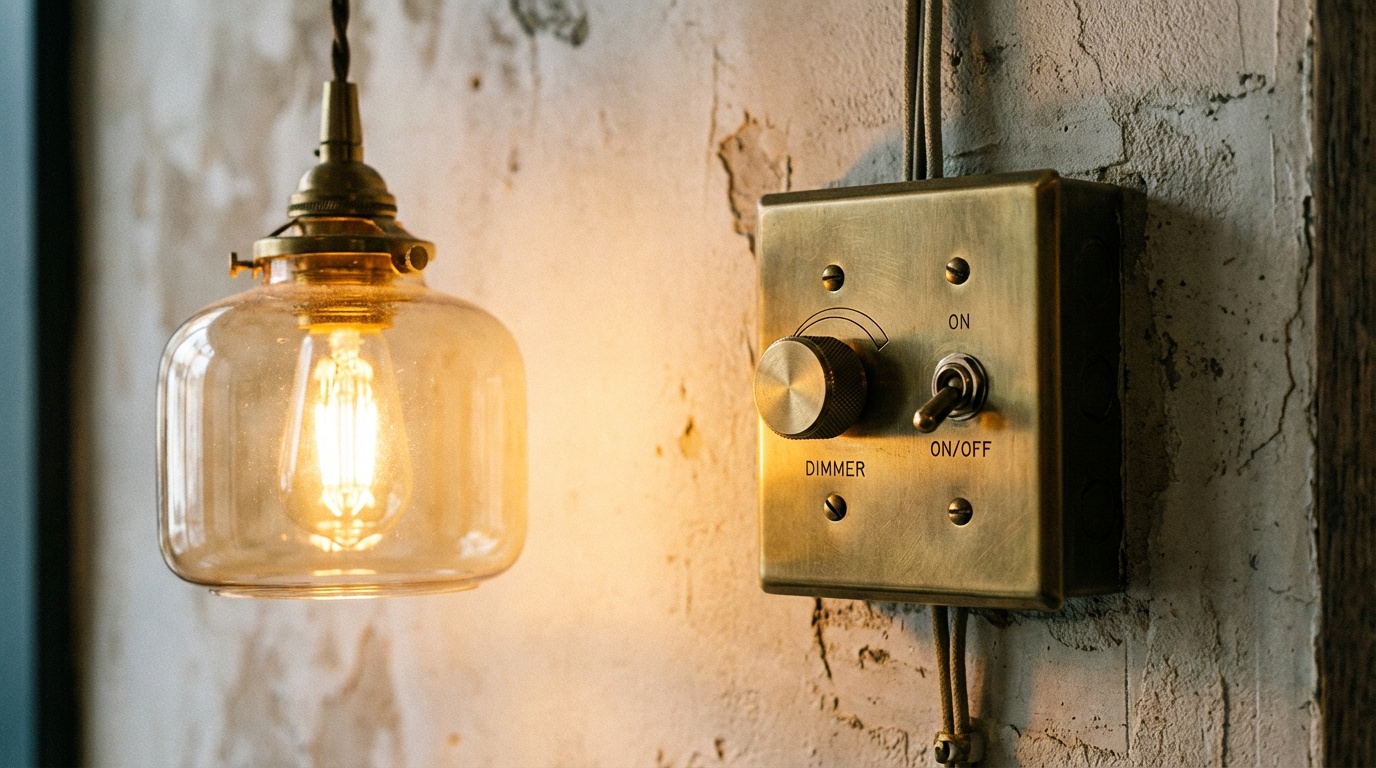
One important nuance that beginners often miss: ambient light should be controllable. Installing dimmer switches on your ambient sources allows you to drop the base layer in the evenings for a cozy atmosphere, or bring it up when you need full functionality. In 2026, most quality LED fixtures are compatible with smart dimmers — a feature worth prioritizing from the start.
Layer 2: Task Lighting — Precision Where You Need It
Task lighting does exactly what the name suggests: it illuminates specific areas where focused activities take place. Reading, cooking, applying makeup, working at a desk, chopping vegetables — these all demand brighter, more directed light than ambient sources can provide without creating glare or eye strain across the entire room.
Effective task lighting is:
- Bright enough to reduce eye strain (typically 500–1000 lux at the work surface)
- Directed at the task, not the person’s eyes
- Positioned to minimize shadows — especially important for left- or right-handed users
- Separate from ambient controls so it can be used independently
Classic examples of task lighting include under-cabinet kitchen lights, desk lamps, bathroom vanity lights flanking a mirror (not mounted above it, which creates unflattering downward shadows), and reading lights clipped to a headboard or positioned beside a chair.
A quick scenario: imagine you’ve got a beautiful open-plan kitchen with recessed ambient lighting giving you a warm, even 250 lux across the room. That’s lovely for hosting dinner, but the moment you start chopping ingredients on your countertop, you’re working in your own shadow. Adding LED strip lights mounted under your upper cabinets — throwing 700+ lux directly onto the counter — instantly transforms the space into a functional cooking environment without disturbing the ambient mood elsewhere.
Layer 3: Accent Lighting — Drama and Depth
Accent lighting is the layer that takes a room from functional to extraordinary. Its purpose is to draw attention to specific elements — artwork, architectural features, textured walls, plants, collections, or any focal point you want to celebrate visually. It adds depth, creates visual interest, and gives a space personality.
The general rule of thumb for accent lighting is that it should be approximately three times brighter than the ambient light level in the area it’s highlighting. This contrast ratio is what creates the dramatic “spotlight effect” that makes a painting leap off the wall or a bookshelf look curated and intentional.
Popular accent lighting tools include:
- Adjustable recessed spotlights or gimbal lights aimed at artwork or features
- Picture lights mounted above or below a frame
- Wall sconces with directional elements
- LED strip lights inside shelving or cabinetry
- Uplights placed behind large plants or at the base of architectural columns
- Grazing lights that skim across textured surfaces like exposed brick or wood panels
Accent lighting is also where color temperature choices become especially expressive. A warm 2700K spotlight on a golden-toned oil painting creates an entirely different mood than a crisp 3000K LED on a modern black-and-white photograph. The best designers treat accent lighting like a curator treats gallery lighting — with intentionality and care.
How to Balance the Three Layers in Any Room
Knowing the three layers is one thing — knowing how to balance them is where the real skill lies. Here’s a practical framework for achieving that balance:
Step 1: Start with Function
Before picking a single fixture, map out how the room is actually used. A living room that doubles as a home office has different lighting needs than one used purely for relaxation. List every activity that happens in the space and assign a layer to each.
Step 2: Design Your Ambient Foundation First
Plan your ambient sources to achieve even, dimmable base illumination. Aim for coverage that eliminates dark corners without creating glare. Use a lighting layout tool or simply calculate your room’s square footage: a rough guideline is 20–30 lumens per square foot for living areas.
Step 3: Layer in Task Lighting at Each Activity Zone
Identify every activity zone and ensure it has dedicated task lighting that can operate independently of the ambient system. Don’t rely on ambient light to do double duty here — it will always be a compromise.
Step 4: Add Accent Lighting Selectively
Resist the urge to accent everything — that’s the design equivalent of bolding every word in an essay. Choose two to four focal points per room and highlight them deliberately. Quality over quantity.
Step 5: Unify with Controls
The final — and often overlooked — step is ensuring your layers can be controlled independently and, ideally, grouped into scenes. A “movie night” scene might dim ambient to 20%, turn off task lights, and leave a single accent light glowing. A “morning routine” scene might bring ambient to full, activate task lighting at the vanity, and leave accent lights off. Smart dimmer systems and platforms like Lutron Caséta, Philips Hue, or Matter-compatible ecosystems (which have become standard in 2026) make this effortless.
Room-by-Room Strategy: Practical Scenarios
The Living Room: Flexibility Is Everything
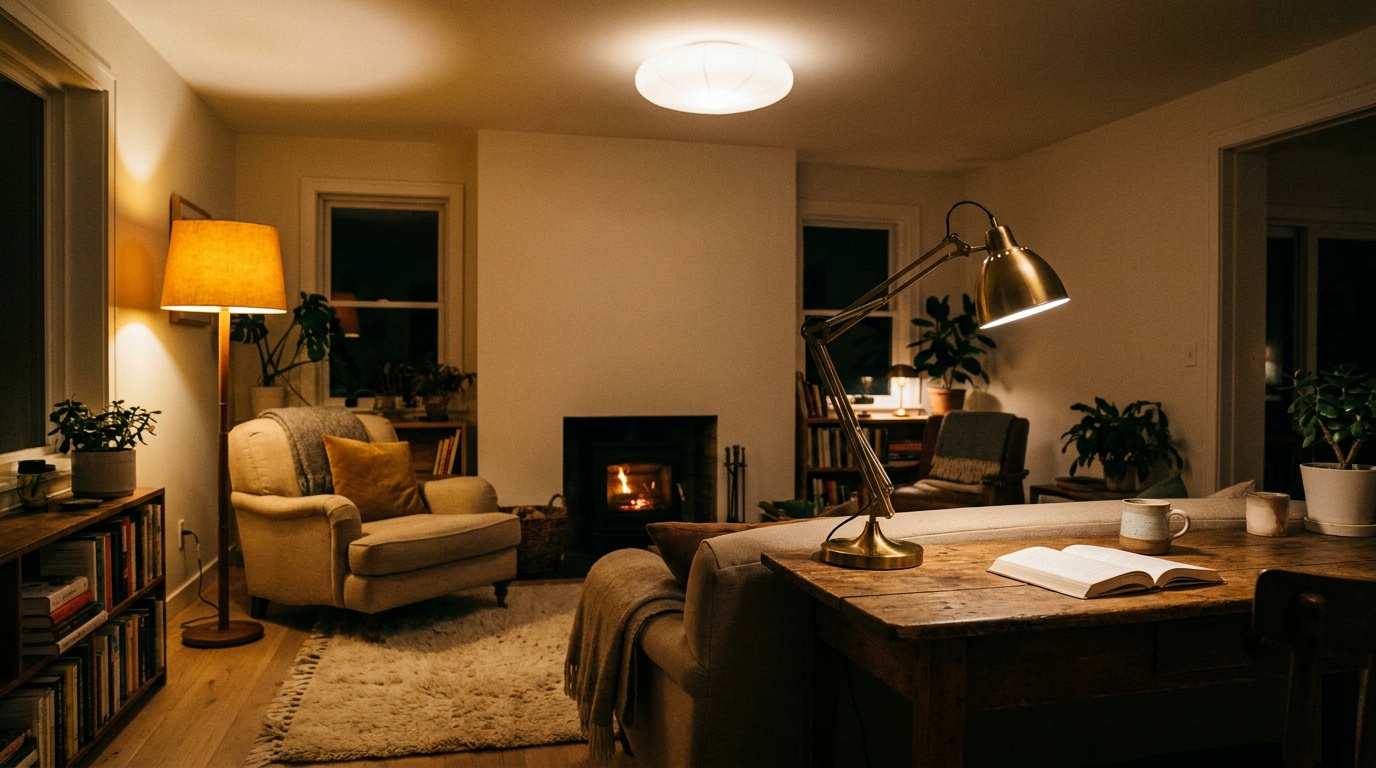
The living room is the most multi-functional space in most homes, which makes layered lighting especially critical here. Consider the case of Sarah and Marcus, a couple in Portland who redesigned their 380-square-foot living room in late 2025. They had been living with a single overhead fixture and one floor lamp for years, and the room felt simultaneously too bright for evenings and too dim for reading.
Their solution: four dimmable recessed lights on a smart dimmer for ambient coverage; a dedicated reading floor lamp with a swing arm beside their main seating area for task lighting; two adjustable spotlights aimed at a large gallery wall for accent; and LED strip lighting inside their media console for warm backlighting that reduced screen eye strain in the evenings. The result? Four completely different “modes” for the same room — all controlled through a single app, all contributing to a space that felt both professional and deeply livable.
Key living room principles:
- Always use dimmers on ambient sources
- Position floor and table lamps to fill vertical “dark zones” near seating
- Backlight your TV or media wall to reduce contrast fatigue
- Don’t forget the floor — uplighting plants or corner features adds unexpected warmth
The Kitchen: Safety Meets Sophistication
Kitchens are the space where task lighting most directly impacts safety, which means getting the balance right isn’t just aesthetic — it’s practical. A well-layered kitchen typically includes: overhead ambient lighting (recessed or a central pendant over an island), under-cabinet task lighting for countertops, and accent lighting inside glass-front cabinets or above open shelving.
One increasingly popular approach in 2026 is zoned kitchen lighting — treating the island, countertops, dining area, and prep zone as separate lighting circuits. This allows a chef to illuminate only the cooking zone during meal prep, then shift to a more intimate ambient scene for dinner without getting up from the table.
Smart Lighting in 2026: Integrating Technology
The smart lighting market has undergone significant maturation. By early 2026, over 54% of newly constructed homes in the US include pre-wired smart lighting infrastructure, according to the National Association of Home Builders. The adoption of the Matter 1.4 protocol — the universal smart home standard — means that devices from different brands now communicate seamlessly, eliminating the frustrating compatibility issues that plagued earlier generations of smart lighting.
For layered lighting design, smart technology offers three transformative advantages:
- Scene programming: Save and recall specific combinations of ambient, task, and accent settings for different times of day or activities with a single tap or voice command.
- Circadian-tuned lighting: Automatically shift color temperature throughout the day — from energizing 4000K in the morning to relaxing 2700K in the evening — across all three layers simultaneously.
- Motion and occupancy integration: Task lighting that activates only when someone enters a specific zone (like an under-island prep area) reduces energy waste without sacrificing convenience.
Pro Tip: When budgeting a smart lighting retrofit, prioritize dimmer switches and smart hubs over individual smart bulbs where possible. Replacing the dimmer controls your entire circuit — giving you scene control at a fraction of the cost of swapping every bulb.
Smart Lighting Adoption by Room Type (2026 US Homes)
Percentage of smart-lighting-equipped rooms in homes with at least one smart device
78%
65%
59%
52%
34%
Source: Smart Home Research Group, 2026 Annual Lighting Survey
Common Layered Lighting Mistakes and How to Fix Them
Mistake 1: Relying on a Single Overhead Source
This is by far the most common lighting error in residential spaces. A single central overhead fixture — even a beautiful chandelier — creates a flat, one-dimensional quality of light with harsh shadows and zero flexibility. Fix: Add at least one dedicated task source and one accent element per room, even before investing in dimming or smart controls. A $40 plug-in floor lamp and a $25 LED picture light can transform a flat room into a layered one almost immediately.
Mistake 2: Mismatching Color Temperatures
Mixing a 3000K pendant with a 5000K desk lamp and a 2700K floor lamp in the same room creates a visual discord that people often feel before they consciously identify it — the room just seems “off.” The fix is straightforward: choose a consistent color temperature range for your ambient and task layers (most interior designers recommend staying within 2700K–3000K for living spaces and 3000K–4000K for work-focused areas), and use warmer temperatures (2200K–2700K) deliberately as accent sources for atmosphere.
Mistake 3: Forgetting Vertical Surfaces
Most people light their floors and work surfaces while completely ignoring their walls. But walls comprise the majority of your visual field when sitting or standing in a room. Leaving them dark creates an enclosed, sometimes oppressive feeling. Wall washing — using ambient or accent lights to softly illuminate vertical surfaces — opens up a space dramatically and makes it feel larger and more inviting. Even adding a single wall sconce or an uplight in a corner can transform the perception of a room’s size and warmth.
Lighting Layer Comparison at a Glance
| Attribute | Ambient | Task | Accent |
|---|---|---|---|
| Primary Purpose | General illumination & navigation | Focused activity support | Highlighting & drama |
| Typical Lux Level | 150–300 lux | 500–1,000 lux | 3× ambient ratio |
| Key Fixtures | Recessed lights, chandeliers, flush mounts | Desk lamps, under-cabinet strips, vanity lights | Spotlights, picture lights, uplights, strip LEDs |
| Control Priority | High — dimmers essential | Medium — separate switching | Medium-High — scenes beneficial |
| Budget Priority | High (infrastructure investment) | Medium (functional essentials) | Flexible (aesthetic upgrade) |
Frequently Asked Questions
How many light sources do I really need in a standard living room?
There’s no universal number, but a well-layered living room typically benefits from a minimum of five to seven distinct light sources: two to four recessed or ceiling-based ambient fixtures, one to two dedicated task sources (reading lamps, etc.), and two to three accent elements (spotlights on artwork, shelf lighting, or an uplight). This might sound like a lot, but remember — not all of them are on simultaneously. The goal is flexibility, not brightness overload. Start with your ambient layer and task essentials, then add accent elements progressively as your budget allows.
What color temperature should I use for each lighting layer?
For most residential spaces, a warm white range of 2700K–3000K works beautifully across all three layers, creating a cohesive, inviting atmosphere. If you have a home office or kitchen where alertness and color accuracy matter, consider 3000K–3500K for task sources in those zones. Avoid going above 4000K in living or sleeping areas — it creates a clinical, hospital-like quality that undermines comfort. For accent lighting on warm-toned materials (wood, brick, warm paintings), lean toward 2200K–2700K to enhance richness and depth.
Can I retrofit layered lighting without a full renovation?
Absolutely — and this is one of the most encouraging aspects of modern lighting design. Many powerful layered lighting upgrades require no rewiring whatsoever. Plug-in floor lamps and table lamps add task and ambient layers instantly. Plug-in picture lights and battery-powered LED spotlights (with motion sensors and USB recharging, now widely available in 2026) add accent capability without touching your electrical system. LED strip lights with adhesive backing can be installed under cabinets or inside shelving in minutes. Smart bulbs in existing fixtures give you scene control and dimming without changing hardware. A complete lighting transformation for a single room is achievable for $150–$400 without a single tool beyond a screwdriver.
Light Your Way Forward: Your Implementation Roadmap
Layered lighting isn’t a luxury reserved for designer showrooms and five-star hotels — it’s a practical, achievable transformation available to any home and any budget. As smart technology continues to democratize lighting control and LED innovation pushes costs lower every year, the gap between a beautifully lit space and a flat, one-note room has never been easier to close.
Here’s your five-step action plan to get started:
- Audit your current lighting this week. Walk through each room and honestly assess: Do you have all three layers represented? Which layer is weakest? Write it down. This clarity alone will focus your energy and spending.
- Fix your ambient foundation first. If you don’t have dimmers on your main lighting circuits, install them before anything else. This single upgrade — typically $25–$60 per switch — unlocks the flexibility that makes every other layer work better.
- Add task lighting to your two highest-priority zones. Identify where you most frequently struggle with insufficient light for specific activities and address those spots directly, even with simple plug-in solutions.
- Choose one focal point per room and accent it. Pick your favorite piece of artwork, architectural feature, or object in each room and add a dedicated accent light. Notice how it transforms the room’s personality.
- Build toward scene control. As your layered system develops, invest in smart dimmers or smart bulbs to begin programming scenes. Even two or three saved scenes per room — “daytime,” “evening,” “entertaining” — will fundamentally change how you experience your home.
Here’s a broader truth worth sitting with: the way we light our spaces shapes how we feel in them — and how well we function, rest, and connect with the people we share them with. As research continues to validate the links between lighting quality and mental health, sleep, and productivity, investing in better layered lighting is increasingly an investment in quality of life, not just aesthetics.
So here’s the question worth asking yourself today: Which room in your home most urgently needs better light — and what’s the single first step you’ll take this week to start transforming it?
Article reviewed by Tom Schuster, Roofing & Water Damage Rehabilitation Expert, on May 4, 2026